Monday, March 4, 2013

Cakes in Baby Food Jars


I know I kind of started with the crafts blog and then slipped into a coma J but I am hoping to revive it once more. So last month, valentine’s day was all the rage and since my daughter is in school now and has a valentine’s day party, I thought I might make something special for her to give her classmates. I recently joined Pinterest, and boy do they have ideas on there!!! So I found 
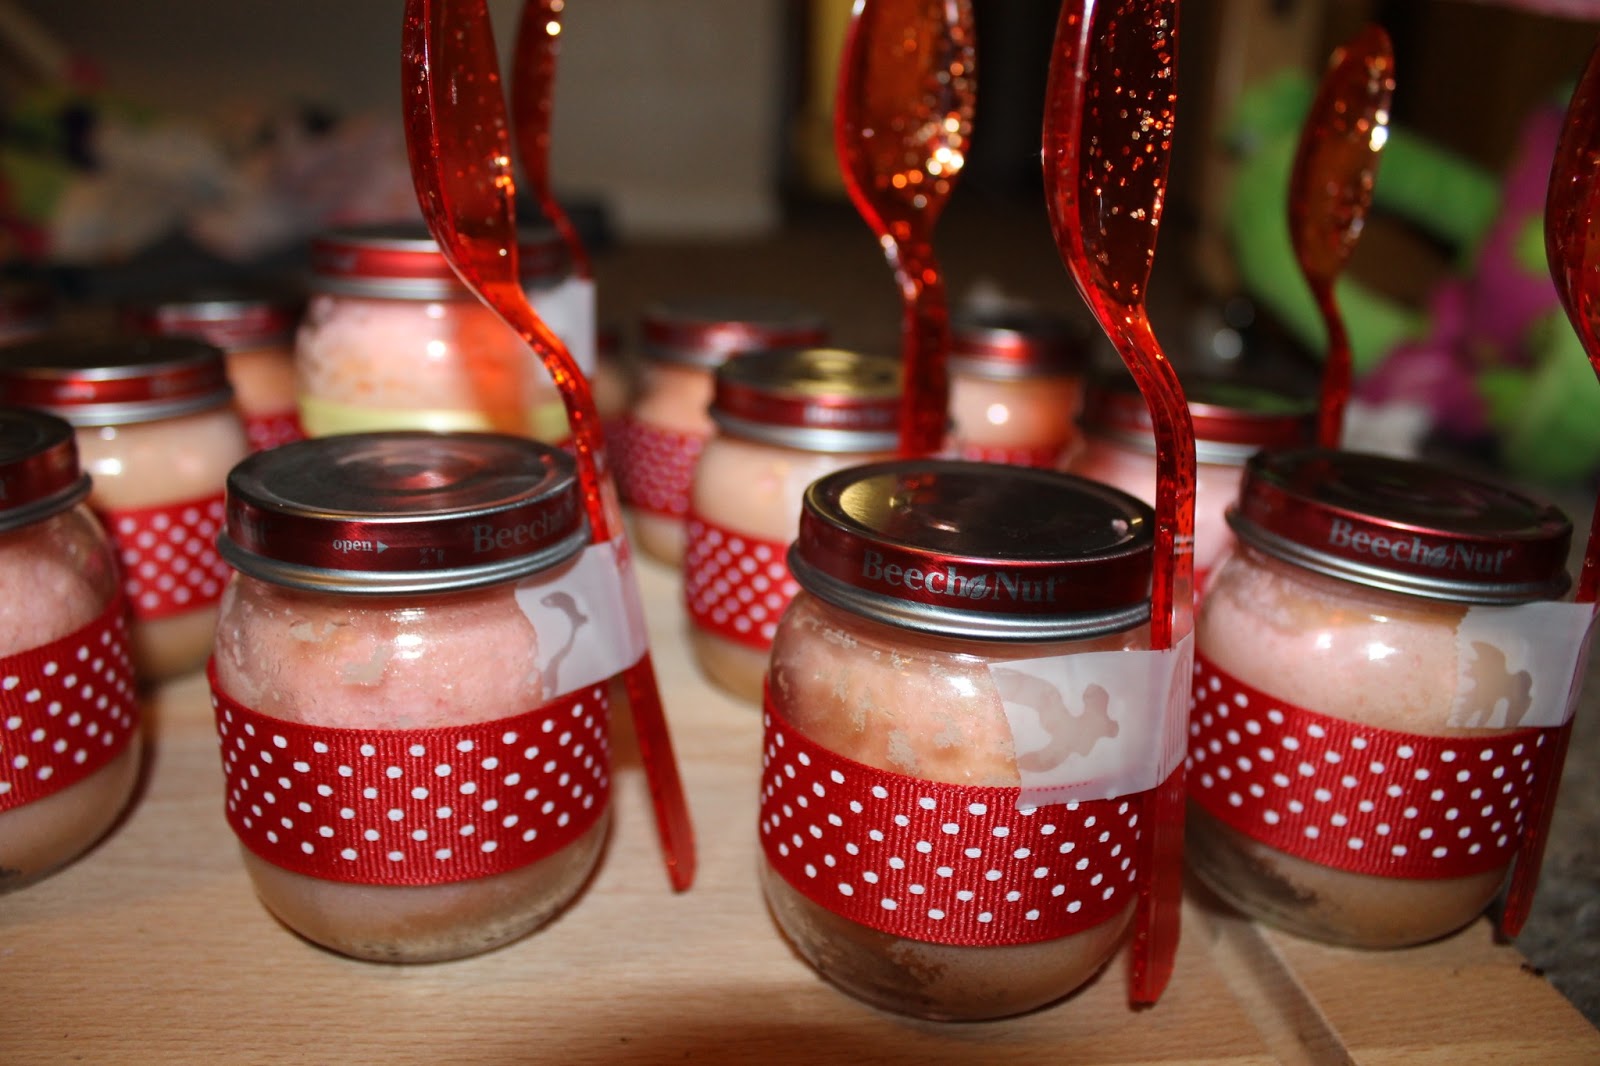
this cute idea on a few blogs for cakes made in baby food jars. Apparently, cakes in jars (of all shapes and sizes) are the in-thing right now. I didn’t even know you could stick baby food jars and mason jars into ovens!!! Anyway, these ideas to make cakes in baby food jars were mainly for baby showers, but it can really be used for any occasion. So this is what I did….


1.       Get your hands on some baby food jars.


2.       Remove as much as you can of the label with your hands.


3.       Then stick them in the dishwasher and let it run.
4.       Remove what little is left of the glue (if any) of the label with a little olive oil on a paper towel.
5.       Wash the bottles once more so the olive oil doesn’t stay and make it slippery.
6.       Next, mix your cake batter as you normally would – whether from scratch or from a box doesn’t really matter.
7.       Then add your favourite food colouring to the mix. I added red this time since they were for Valentine’s Day. You can even separate your batter into three or four bowls and mix different colours into each and layer the cake to make it colorful.
8.       Pour out your batter into the bottles, filling the bottles up to just less than halfway. I poured a little more than half, and the cake puffed up and outside the bottle as well.
9.       Stick the bottles into a cupcake pan, or line them up on a cookie sheet.
10.   Cook the cakes as you usually do, and voila! Your cute little cakes in jars are ready.


I have heard that these can be sealed by boiling the lids in water and screwing them on when hot, but I didn’t try to seal mine. I added some ribbons on the bottle to make them look more festive and appealing, and even accessorized the kids’ bottles with a spoon that they could use to eat the cake. Needless to say, they were a huge hit!


Wednesday, September 8, 2010

Makeshift Quilling

A simple flower


Quilling is a technical craft, that when done with precision, can give beautiful results. But not everyone is always able to buy and use all the professional equipment for their recreation. But this does not mean that we need to give up on all our craftly endeavours. Makeshifts are the way I run my life many times when it comes to trials in craft and my try at quilling was one such experience. An actual quilling needle is like a piece of wood, with a needle stuck on it. This needle has an opening through which you insert the quilling paper and then roll it into a coil. There is also special paper available in many craft stores for quilling. Having said that, what do I do? I tear up craft paper, easily available in stationery stores, and even in many department stores, into thin strips and use them as my quilling paper. I do not use a needle to coil the paper. Instead, I use my hands to make as precise a coil as possible. You could also use a toothpick to coil the paper. It is a slow process, but it does work. Now once you have made a coil of the strip of paper, hold it in place for a few seconds, and then let it go. It will slowly start uncoiling a little and then stop. Now glue the end of the strip to make it a coil without an open end, without disturbing the shape. Then bend the paper coil to the desired shape. There are many shapes to choose from, and if you are the imaginative sort, I am sure you will decipher out new shapes to make too. I usually use petal shapes and rounds a great deal. The usual shapes are as follows:
1.       Petal: squeeze the coil on both ends between your thumb and pointer so that you have two pointed ends; it is almost an oval shape.
2.       Teardrop: squeeze just one end of the coil, leaving the other end rounded.
3.       Tight coil: roll up the paper into a tight coil, and glue it up without letting it uncoil. This shape can be used as a centre of a flower.
4.       Loose coil: this is where you use the coiled paper, after gluing it up after letting it uncoil, as it is, without bending and shaping it any further.
There are many other shapes you can make. Plenty of resources are available on the internet, and you can also improvise on the shapes yourself as you go. Happy quilling!